Understanding & Mastering Sourdough
No elitist baker dogmatism, no 50-page biochemical lectures. Here you'll find the tested Minimal Viable Setup, the Flour Matrix, the 5-Day Bootstrapping Plan, interactive Starter Fork Calculators, and the Sourdough Doctor for typical kitchen panics.
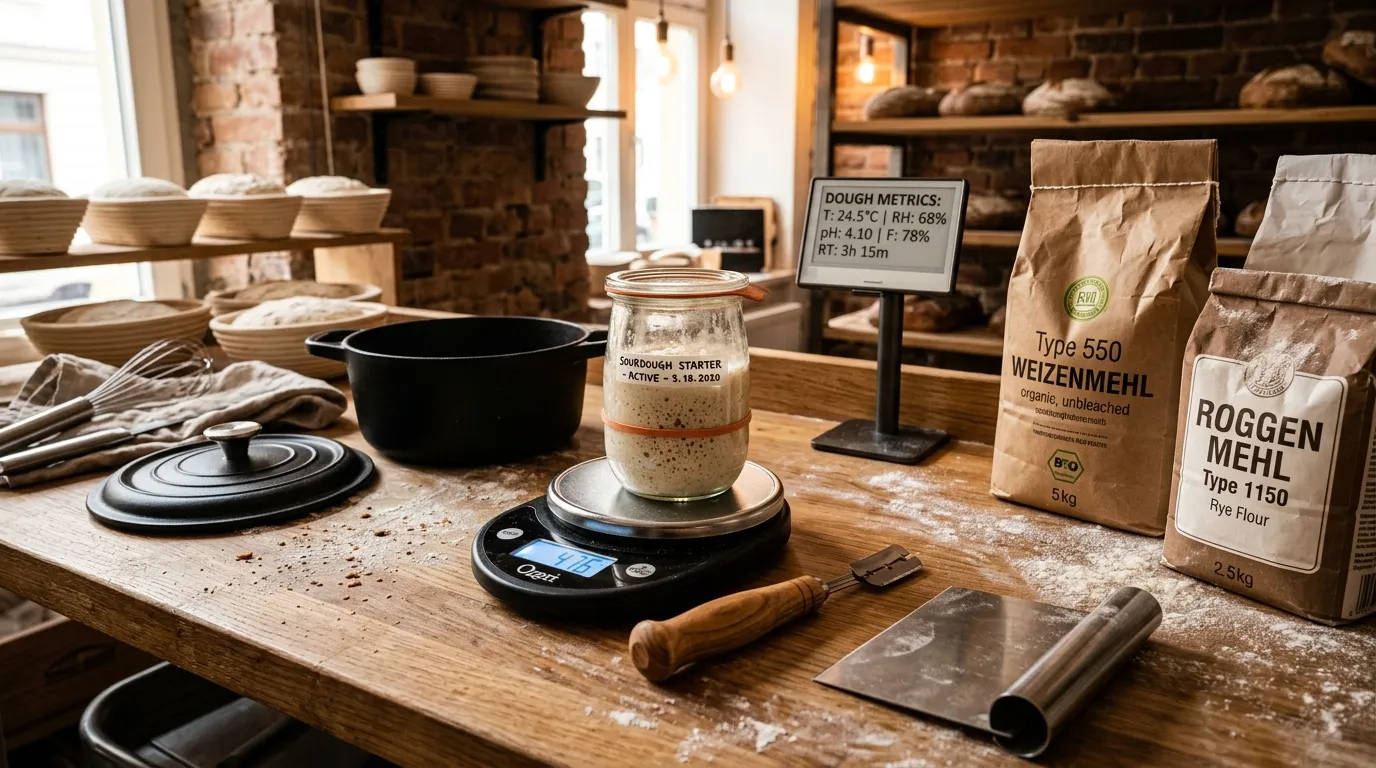
1. The Gear You Actually Need (Hardware & Tools)
You don't need an $800 dough mixer. This battle-tested setup yields world-class crusts:
1. Digital Kitchen Scale (1g Precision)
Measuring flour with cups or spoons yields undefined behavior: depending on packing density, 1 cup of flour varies between 110g and 160g (+45% variance!). Only exact grams guarantee reproducible crumb structure.
2. Cast Iron Dutch Oven (24–26 cm)
Your personal steam capsule. Standard domestic ovens leak moisture through exhaust vents. Inside a preheated, lidded Dutch oven, moisture evaporating from the dough creates 100% saturated steam for explosive oven spring.
3. Flexible Plastic Scraper & Bench Knife
The natural extension of your hands. A flexible rounded scraper releases sticky dough from the bowl without deflating gas pockets. A rigid bench knife builds surface tension during preshaping.
4. Razor Blade / Baker's Lame
Kitchen knives snag and tear delicate dough skins. A razor-sharp, ultra-thin blade cuts smoothly at a 30°–45° angle, ensuring the loaf expands cleanly along the score line to create the coveted ear.
5. Cylindrical Weck / Mason Jar (500–750 ml)
The home of your sourdough daemon. Straight, vertical walls allow a simple rubber band to track exact volume expansion (doubling / tripling). Always leave the lid loose – never hermetically seal fermenting jars!
6. Digital Probe Thermometer
Dough temperature is the single biggest variable in fermentation: a 2°C change can halve or double proofing time! Also checks bread doneness: at 96°C to 98°C internal temperature, crumb gelatinization is complete.
7. Cane Proofing Basket (Banneton)
Wicks moisture from the dough exterior during cold retardation, stabilizes loaf shape, and imprints the classic spiral artisan ring pattern onto the crust.
8. Expensive Stand Mixers & Proofing Boxes
You need neither an $800 mixer nor a climate chamber! Coil folds and stretch-and-folds build a stronger gluten network with 3x 30 seconds of gentle handling. A standard plastic mixing bowl lined with a floured tea towel does the job on day 1.
2. Decrypting Flour Types (The Science of Extraction)
Numbers like 405, 550, 1050, or W-ratings are not version numbers, but mineral ash and gluten metrics!
💡 The Ash Test (DIN 10355) Explained in 20 Seconds:
When 100g of dry flour is incinerated in a laboratory furnace at 900°C, starch and protein vaporize. What remains are the unburnable minerals from the outer grain bran – the mineral ash.
The higher the extraction number:
- 💧 The more water it absorbs (+4% to +10% hydration capacity)
- 🌾 The deeper and nuttier the crust aroma
- ⏰ The faster the dough ferments due to active grain enzymes
- 📉 The tighter the crumb pore structure (sharp bran flakes cut gluten chains)
🧪 How will your chosen flour behave?
Select a flour to simulate optimal hydration absorption, gluten stability, and baker recommendations:
Balanced ratio of extensibility and elasticity. Effortlessly forms a stable dough matrix without additives.
When starting out, grab a 5kg bag of Type 550 (or strong bread flour). Forgives small errors and yields glossy crumbs.
International Flour Matrix Comparison
All metrics tested and calibrated in our home bakery:| Flour & Origin | Character & Gluten | Hydration | Best Use Case |
|---|---|---|---|
| 🇩🇪 German Standard Flours | |||
| Wheat Type 550 | Strong, elastic gluten matrix, uniform crumb pores. | 68–74% | BEST CHOICE The universal standard for country loaves and dinner rolls. |
| Wheat Type 1050 | Semi-whole wheat, higher ash, rich nutty flavor profile. | 72–78% | Great as 20–40% flavor booster in mixed sourdoughs. |
| Spelt Type 630 & 1050 | Highly digestible, softer gluten matrix (high gliadin content). | 66–72% | Handle gently! Vigorous kneading tears the delicate spelt gluten network. |
| 🇮🇹 Italian Specialties (Tipo & Semola) | |||
| Tipo 00 (e.g. Caputo) | Silky fine extraction, high elasticity (W260–W320). | 62–70% | Perfect for Pizza Napoletana, focaccia, and fresh pasta. |
| Semola Rimacinata (Durum) | Twice-milled durum wheat semolina. Golden yellow, nutty, absorbs immense water. | 70–78% | The secret of Pane di Altamura! Creates the crunchiest, most splintering crust on earth. |
| 🇫🇷 French Tradition Flours (Farines de Tradition) | |||
| T65 (Farine de Tradition) | Low ash, specific starch and protein composition. | 70–78% | The indispensable baguette flour! Yields glossy, open honeycomb crumbs. |
| T80 (Farine de Campagne) | Stoneground with germ retained, mineral-rich and rustic. | 74–82% | Classic French Pain de Campagne with pure sourdough fermentation. |
| 🌾 The Rye Spectrum (Zero Gluten, Pure Pentosan Power) | |||
| Rye Type 1150 | The German king of rye flours. Optimal acid-to-starch balance. | 75–82% | Benchmark starter flour and sturdy farmer loaves. |
| Whole Rye Flour | Whole grain including germ. Fermentation rocket fuel. | 82–90% | The ultimate elixir for bootstrapping a fresh starter from scratch. |
| 🚀 High-Performance Wheat | |||
| Manitoba (W > 350) | High-protein wheat (14–15% protein) from North America / Italy. | 80–90% | Used for tuning weaker organic flours or Panettone & 85% hydration challenges. |
3. Bootstrapping a Starter from Zero (The 5-Day Plan)
All you need is organic whole rye flour, lukewarm tap water, and 5 days of patience:
The Mixture (Init)
Formula: 50g whole rye flour + 50g warm water (~30°C) mixed in a clean jar. Rest lid loosely. Let stand 24h at a warm room temperature.
First Signs of Life
Formula: Stir in 50g flour + 50g warm water. Often smells funky or musty – no panic! Those are harmless transitional bacteria (Leuconostoc). Wait another 24h.
Acidity Takes Over
Formula: Keep 50g of the mixture, discard the rest. Feed with 50g flour and 50g water. pH drops sharply below 4.2. Undesirable microbes die off!
The Peak Approaches
Formula: 50g starter + 50g flour + 50g water. Place a rubber band at the fill line! Within 6–10 hours, volume will noticeably rise and form a spongy web.
Status 200 OK: Ready to Bake!
Starter doubles predictably in 4–6 hours, smelling pleasantly fruity like green apple and yogurt.Congratulations: Your personal sourdough is alive and ready for production!
The Float Test: Is Your Starter Active Enough?
Take a glass of room-temperature water and gently drop a teaspoon of starter onto the surface.Does it float? Perfect! The wild yeasts have trapped enough CO₂ gas in the matrix, making its density lower than water. Does it sink? Give it 1–2 more regular feedings or 2°C more warmth!
🔄 Fork Your Starter: From One to Any! (Rye ➔ White, Spelt, Lievito Madre)
The most important tip for lazy bakers: NEVER keep 3 jars in your fridge!Maintain one single indestructible rye starter as your main branch. When a recipe calls for sweet Lievito Madre or white levain, fork off a quick weekend branch the day before.
Rye ➔ White Levain (100% Hydration)
For baguettes and open-crumb country breads: Take 10g rye starter, mix with 50g bread flourand 50g water (1:5:5 ratio). Keep warm at 26–28°C for 4–6 hours. Rye residue is under 2% and yeasts adapt immediately.
Rye ➔ Spelt Sourdough
Spelt breaks down enzymes faster. Take 10g rye starter, feed with 50g spelt flourand only 40g water (80% hydration). Yields a mild, highly active spelt levain within hours.
Lievito Madre (Firm Italian Sourdough, 50% Hydration)
For pizza, panettone, and focaccia: Take 20g starter, 50g flour (Tipo 00 / Manitoba), and only 25g water. Knead into a firm ball, cut a cross on top, and let triple in a narrow glass. Massive lift with zero harsh acidity!
🧮 How much starter does your recipe require?
4. 🚨 Sourdough Doctor: Interactive Emergency Debugger
Kernel panic in your jar? Click your symptom to inspect the root cause and execute an immediate patch:
Your starter is starving! Yeasts and lactobacilli consumed all fermentable sugars in the flour. The liquid is pure ethanol (hooch) – a natural by-product of fermentation. Zero cause for panic!
- Step 1: Pour off the dark hooch liquid in the sink (or stir in for extra sourness).
- Step 2: Transfer 20g of remaining starter into a clean jar. Discard the rest.
- Step 3: Feed with 50g whole rye flour and 50g warm water (1:2.5:2.5 ratio). Within 4–6 hours, it explodes back to life!
5. Adding Yeast is ZERO Shame!
Breaking free from dogmatic sourdough purism.
The internet is flooded with sourdough purists claiming:“A genuine sourdough loaf must never contain a single molecule of commercial yeast!”
“We don't deploy to production without unit tests, we don't code without backups – and we don't bake without a safety net as beginners.”
When a starter is young (under 4–6 weeks old), lactic acid bacteria thrive, but the wild yeast count fluctuates. Without yeast, dough tastes wonderful but rises sluggishly, resulting in flat house bricks.
The No-Panic 1g Yeast Rule:
- 🌱 The Sourdough Starter (100–200g) still delivers 99% of complex flavor, crust caramelization, and digestibility.
- ⚡ A tiny crumb of fresh yeast (0.5g–1g, pea-sized) guarantees reliable oven spring and removes all performance anxiety.
- 🏆 Nobody tastes 1g of yeast, but you'll enjoy a gorgeous, tall, blistered artisan loaf on your table!
6. Baker's Terminology Translated
The essential vocabulary so you can understand any recipe online immediately:
AutolyseMixing flour and water without salt and without starter to rest 30–60 minutes. Enzymes kick off, and the gluten matrix develops spontaneously without intense kneading.
Baker's PercentagesTotal flour weight is always the 100% baseline. All other ingredients (water, salt, starter) are calculated as percentages of this flour weight, making recipe scaling trivial.
Hydration (Water Content)The ratio of water to flour. 70% hydration means 350g water on 500g flour. Higher hydration yields a softer, more open honeycomb crumb – but requires more handling confidence!
Bulk FermentationThe primary proofing phase of the entire dough mass in the bowl after mixing. This is where yeast activity, gas pockets, and structure through folds are generated.
Final Proof (Cold Retardation)The final rise of the shaped loaf in the banneton. Ideally cold overnight (12–16 hrs at 4–6°C in the fridge) – this intensifies aroma and makes scoring effortless!
Ear / Score OpeningThe jagged cut edge that curls upward in the oven due to rapid steam expansion. The hallmark of a great artisan loaf!
Dough Yield (TA)Total dough weight relative to 100 parts flour. 1000g flour + 700g water equals TA 170. A TA below 165 indicates a stiff dough, while TA 175+ is soft.
Starter Inoculant (Anstellgut)The small portion of active starter from the fridge (10–50g) used to inoculate your recipe levain. Replenished immediately after baking.
BassinageTechnique for high hydration doughs: reserving 5–10% of total water and drizzling it into the dough only after an initial gluten network has stabilized.
Windowpane TestGently stretching a small dough piece with wet fingers. If it becomes thin enough to pass light without tearing, gluten development is complete.
Coil Folds (Stretch & Fold)Gentle folding during bulk fermentation: lifting the dough with wet hands from the center, tucking both ends underneath, and rotating 90°. Builds tension without popping gas bubbles.
Steam Ingestion (Schwaden)Water vapor in the initial 15–20 minutes of baking. Keeps the dough crust flexible so the loaf can expand to its fullest potential.
Grab your flour, water, and digital scale!
Select your favorite bread in our recipe database or start with the beginner-friendly No-Panic Country Loaf: